Knowing how to measure your bra size properly can change everything: comfort, posture, how your tops sit, and how confident you feel during the day. Most bra problems people blame on “the bra” (straps slipping, wires digging, cups gaping, bands riding up) are actually sizing or shape issues. The good news is that you can get a strong starting size at home with a soft tape measure and five minutes of focus.
This guide covers the at-home method, how to read your numbers, and the most common mistakes - so you can shop with far less guesswork.

Before you start: what you need
-
A soft measuring tape (tailor’s tape)
-
A mirror (helpful for keeping the tape level)
-
A non-padded bra or bralette that sits comfortably (optional but recommended)
-
A paper or phone to record results
Measure on bare skin or over a thin bra. Avoid measuring over thick padding.

Step 1: Measure your band size (underbust)
This is the most important measurement because the band provides most of the support.
- Stand naturally and breathe normally.
- Wrap the tape around your ribcage directly under your bust.
- Keep it snug and level all the way around (not digging in, not loose).
- Record the number in centimetres. You’ll use this number to find your Australian band size (8, 10, 12, etc.) in the next section.
How it should feel: snug enough that it won’t slide down, but you can still take a comfortable breath.
Converting underbust to band size (Australian sizing)
Convert your underbust (cm) to an Australian band size (starting point):
| Underbust Measurement | Australian Band Size |
| 63-67 cm | 8 |
| 68-72 cm | 10 |
| 73-77 cm | 12 |
| 78-82 cm | 14 |
| 83-87 cm | 16 |
| 88-92 cm | 18 |
| 93-97 cm | 20 |
| 98-102 cm | 22 |
| 103-107 cm | 24 |
| 108-112 cm | 26 |
Example: Underbust 78 cm - band size 14.
If you’re between ranges, start with the smaller band and check comfort - the band should feel firm and sit level, without riding up.
Quick check: When you try a bra, you should be able to fit two fingers under the band, and it should sit level around your body (not riding up at the back).

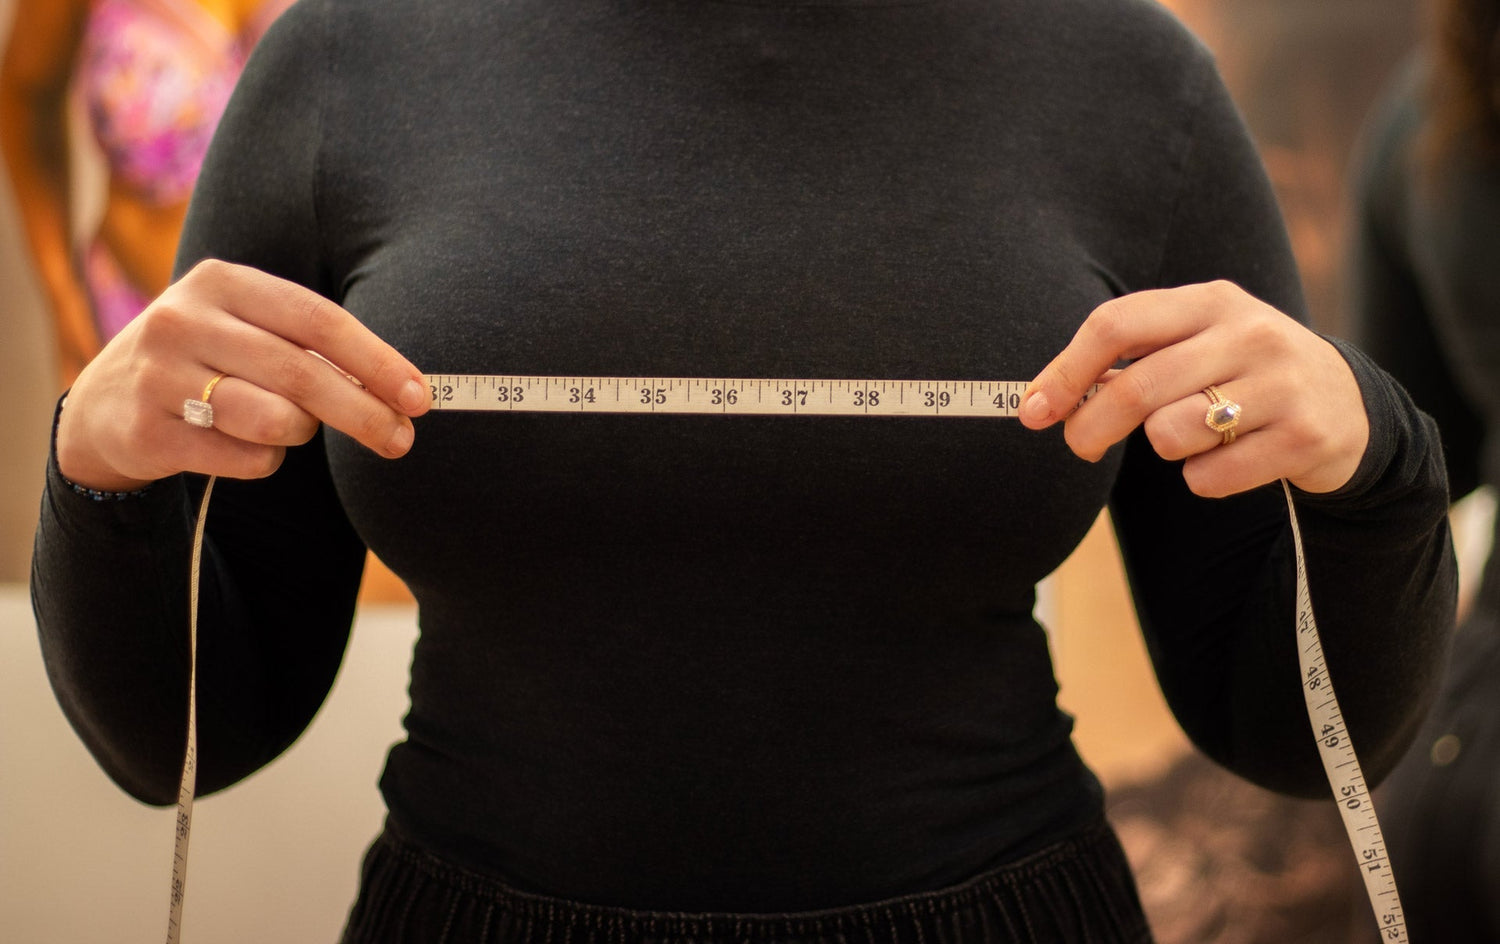
Step 2: Measure your bust (overbust)
- Wrap the tape around the fullest part of your bust.
- Keep it level and lightly resting (not compressing the tissue).
- Arms relaxed at your sides.
- Record the number in centimetres.
If your breasts are fuller at the bottom or softer, measuring while leaning slightly forward can help capture fullness more accurately. Just keep the tape level and avoid tightening.
This measurement will be used together with your underbust number to calculate your starting cup size in the next step.
Step 3: Work out your cup size
Cup size is based on the difference between your bust measurement and your underbust measurement. The larger the difference, the larger the cup. This is why cup letters are not “fixed sizes” - a D cup on a smaller band is not the same volume as a D cup on a larger band.
Example: If your underbust measures 78 cm and your bust measures 94 cm, the difference is 16 cm. This corresponds to a D cup as a starting point in Australian sizing.
Because cup letter systems can vary slightly by brand and style, the most practical approach is:
-
Use your calculated cup as a starting point, then
-
Confirm by checking the fit signs below, and
-
Adjust by one cup up/down if needed.
From measurements to cup size (Australian sizing)
Use the difference between your bust and underbust measurements to find your starting cup size:
| Measurement Difference | Australian Cup Size |
| 10-12 cm | A |
| 12-14 cm | B |
| 14-16 cm | C |
| 16-18 cm | D |
| 18-20 cm | DD |
| 20-22 cm | E |
| 22-24 cm | F |
| 26-28 cm | FF |
| 28-30 cm | G |
| 30-32 cm | GG |
This chart provides a starting point only. Final fit can vary depending on breast shape, tissue softness, and bra style.

The fit checks that confirm your size (or show you what to change)
Once you have your starting size from measurements, the checks below help confirm whether that size truly fits your body.
Even if you measure perfectly, your “best fit” can shift depending on breast shape, tissue softness, bra style (balconette vs plunge), and brand.
A) The band should do the heavy lifting
-
The band sits level around your body
-
Doesn’t ride up at the back
-
Firm on the loosest hook when new (so you can tighten over time)
If the band rides up, the band is too big (or the straps are doing the work).
B) The cups should contain, not squash
-
No spilling over the top or sides (quad-boob)
-
No gaping or wrinkling
-
Smooth line under clothes
If you’re spilling: go up a cup (or change to a style with more coverage).
If you’re gaping: go down a cup or try a different cup shape.
C) The centre gore should sit flat
That’s the piece between the cups. In many well-fitted underwire bras, it should sit against the chest.
If it floats: cups may be too small, the style may be wrong for your shape, or the band may be too big.
D) The underwire should sit around the breast tissue
Underwire should sit on the ribcage, not on breast tissue.
If wires dig into tissue: cup may be too small, or the wire shape may not suit you.
E) Straps are stabilisers, not support beams
Straps should stay on your shoulders without digging.
If straps slip: the band may be too big, or the strap placement doesn’t suit your shoulders.
If straps dig in: the band may be too big (forcing straps to carry weight), or cups may not fit.
 Common measuring and sizing mistakes
Measuring too loose
A loose underbust gives a band that’s too big, causing ride-up, strap digging, and poor support.
Assuming “DD” always means “large”
Cup letters depend on band size. A DD on a smaller band can be moderate, while a DD on a larger band is a different volume.
Wearing the wrong hook
A new bra should usually fit on the loosest hook. If you start on the tightest, it will loosen quickly, and you’ll lose support.
Ignoring breast shape
Two people with the same measurements can need different styles. Full-on-top, full-on-bottom, wide-set, close-set, and projected shapes often require different cup cuts.

Sister sizes: the trick that saves online shopping
If your band feels right but cups don’t, try adjusting with “sister sizes”. The idea:
-
Down a band = up a cup (to keep similar cup volume)
-
Up a band = down a cup
Example (conceptually): if one size feels tight in the band, you might go up a band and down a cup in the same style. This is especially useful when one size is nearly right.
Special considerations: pregnancy, weight changes, and fuller bust support
If your body has changed (pregnancy, postpartum, weight change, hormonal shifts), re-measuring is worth it. Many people keep wearing an old size because it “sort of works”, but discomfort builds slowly. If you’re fuller in the bust, prioritise:
-
Firm, supportive bands
-
Wider straps (for comfort)
-
Cup styles that contain side tissue
-
Strong centre support and stable wires

A final note: measuring is step one, fitting is step two
Measuring and calculating your bra size gives you a strong starting point. The final step is confirming comfort and support in the bra style you actually plan to wear. If your best size changes between a plunge and a full cup, that’s completely normal and where our bra fitters can help.
Not sure which size you land on after measuring? Reach out to our team at Illusions Lingerie - we can help you interpret your measurements, choose the right style for your shape, and reduce the trial-and-error of bra shopping.